MaptiveIQ - Creating a New Map in Maptive
Creating a New Map Tutorial:
Creating a new map in your Maptive account is easy! Just follow the following simple directions, and you'll be mapping in no time:
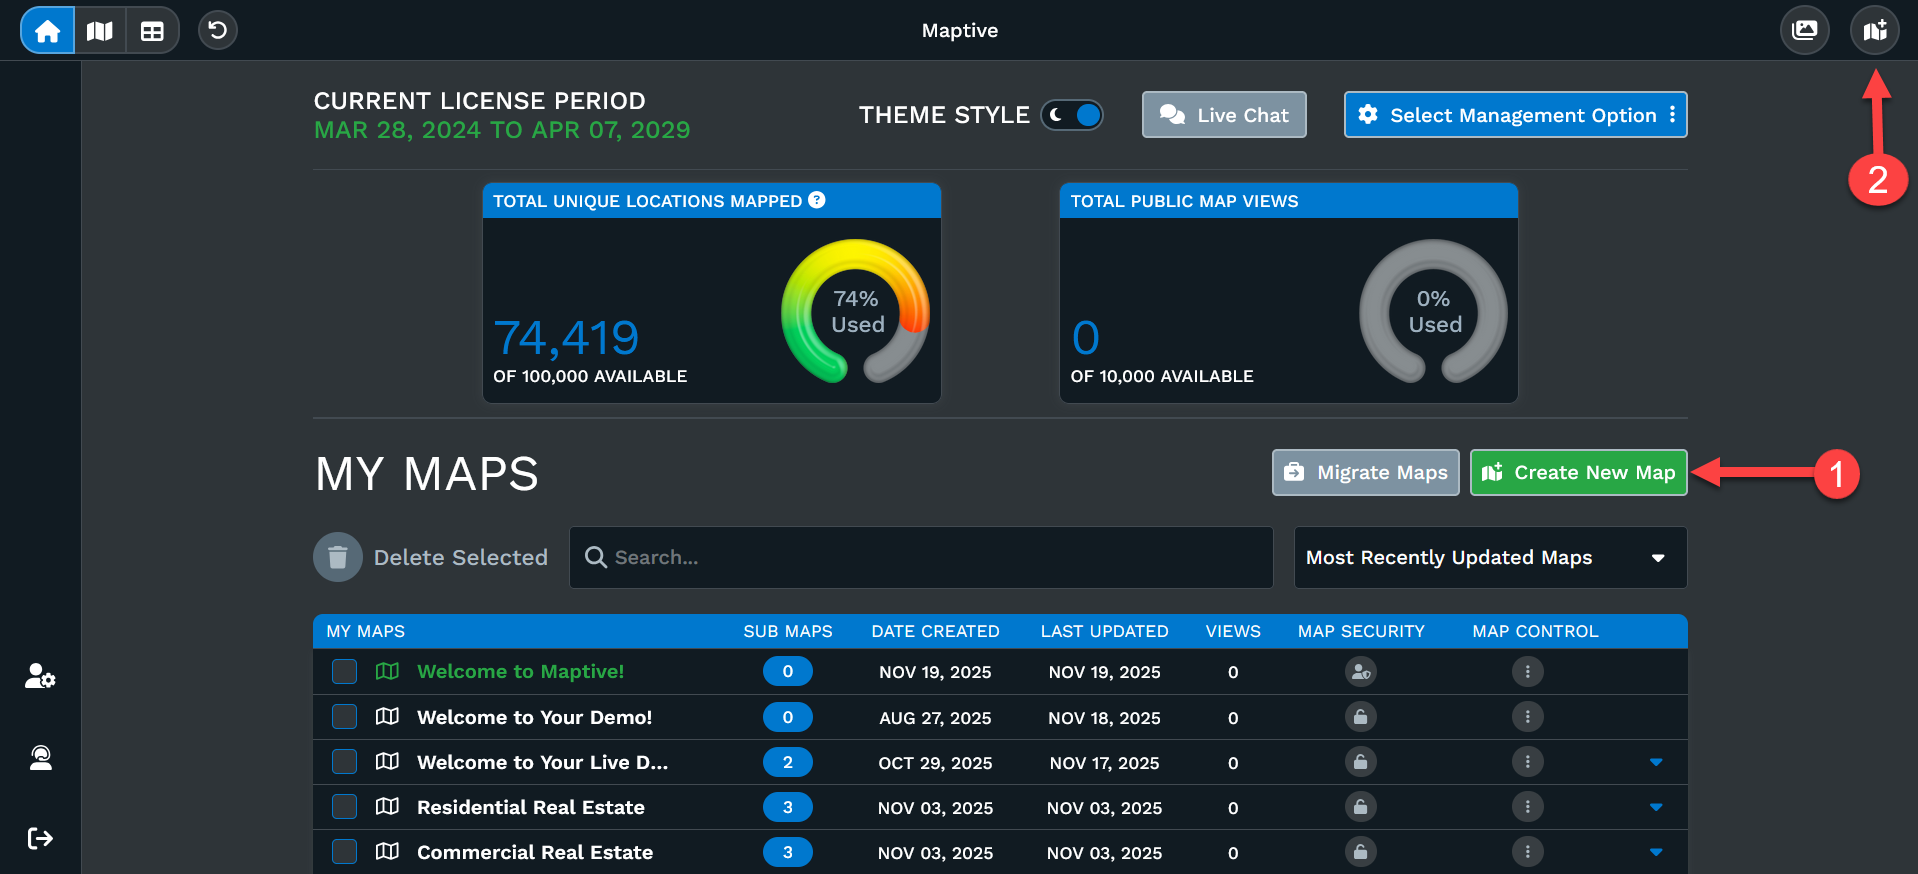
Sign in to your Maptive account. You will enter into the home page listing your account information and your created maps (if you have any created).
Option 1: Click 'Create New Map' on the upper right-hand side to get started.
Option 2: You'll find this button no matter which tab you are on (Home; Map; Data). You can start a new map from anywhere without effecting existing maps.
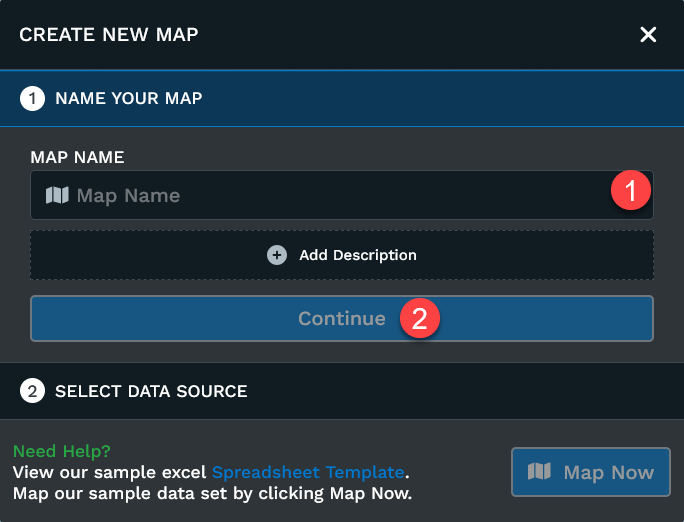
Once you click one of the options, a dialog box will appear where you can (1) name your new map and write a brief description (optional). (2) Click the 'Continue' button when ready.
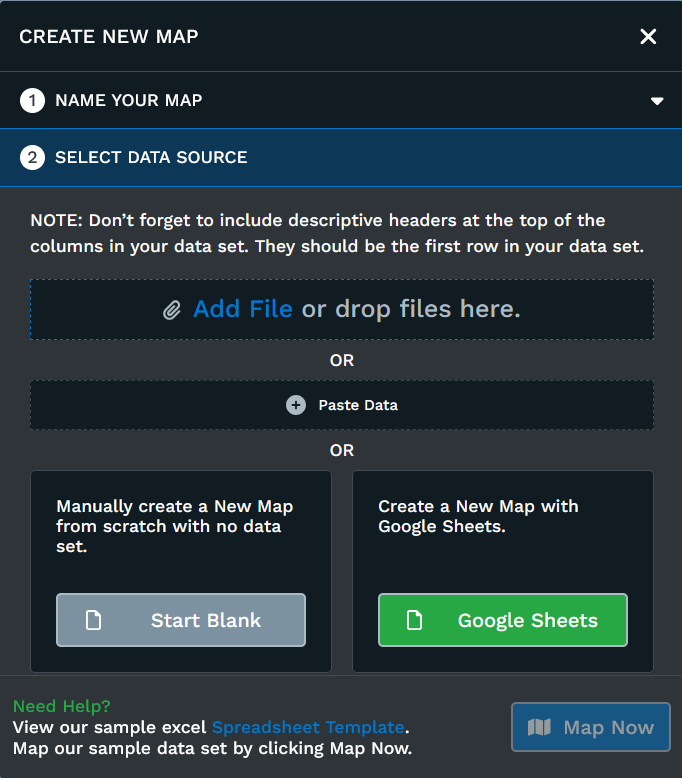
Next, Your Data: Upload your data into Maptive. To do so, you have a few options:
- Drag & drop your existing Excel file or click 'Add File' to search your computer to upload your spreadsheet. Maptive can accept imports of Excel, Csv, Tsv
- You can also choose to copy your data, including your column headers, and paste it into Maptive.
- Create a new map with Google Sheets.
- Manually create a new map from scratch.
Note that your data needs to include header columns (such as Address, City, Zip code, Name, Phone Number, etc.) that tell Maptive what the data is.
After you've uploaded your data, click the 'Map Now' button.
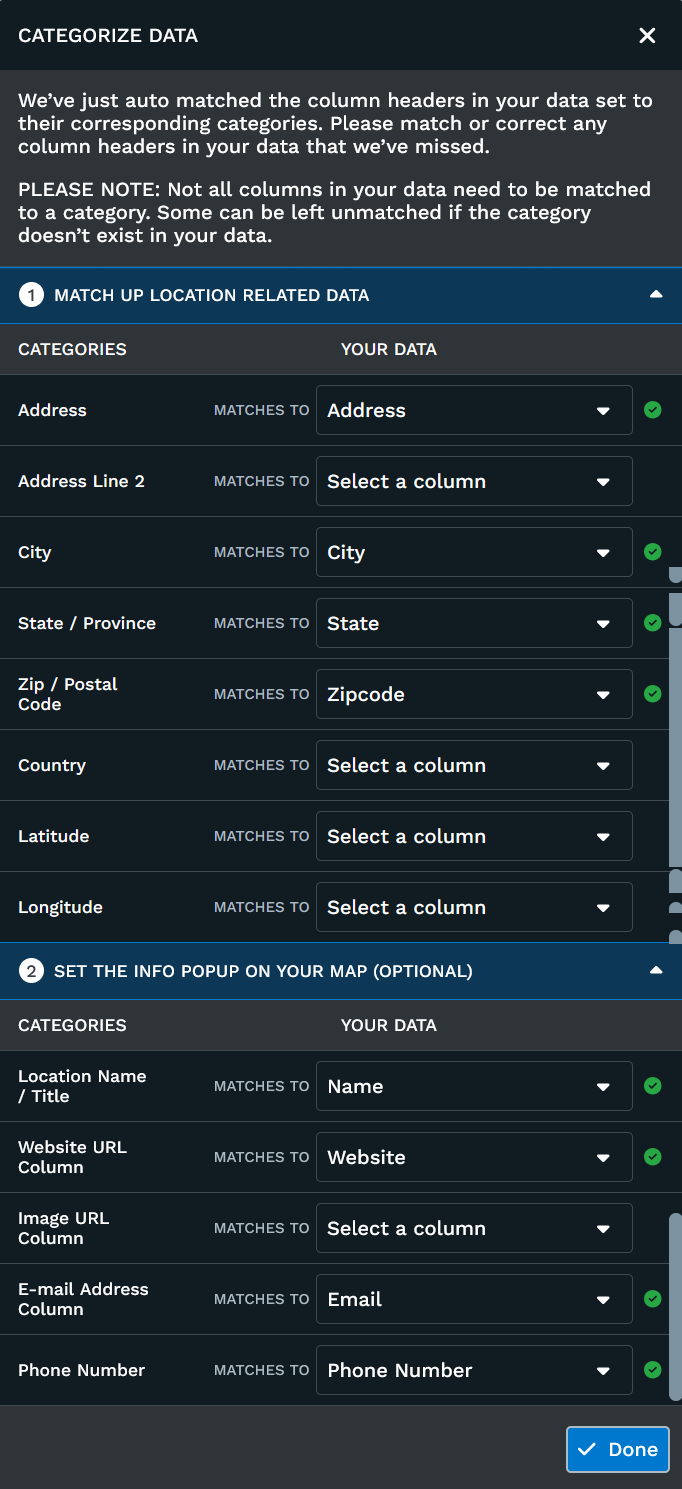
Before You're Finished: After uploading your data, a dialog box may appear. The program will do its best to recognize your address specific columns and match them up automatically, if the system didn't find what was needed . Help With Categorizing Data
Click Done when finished.
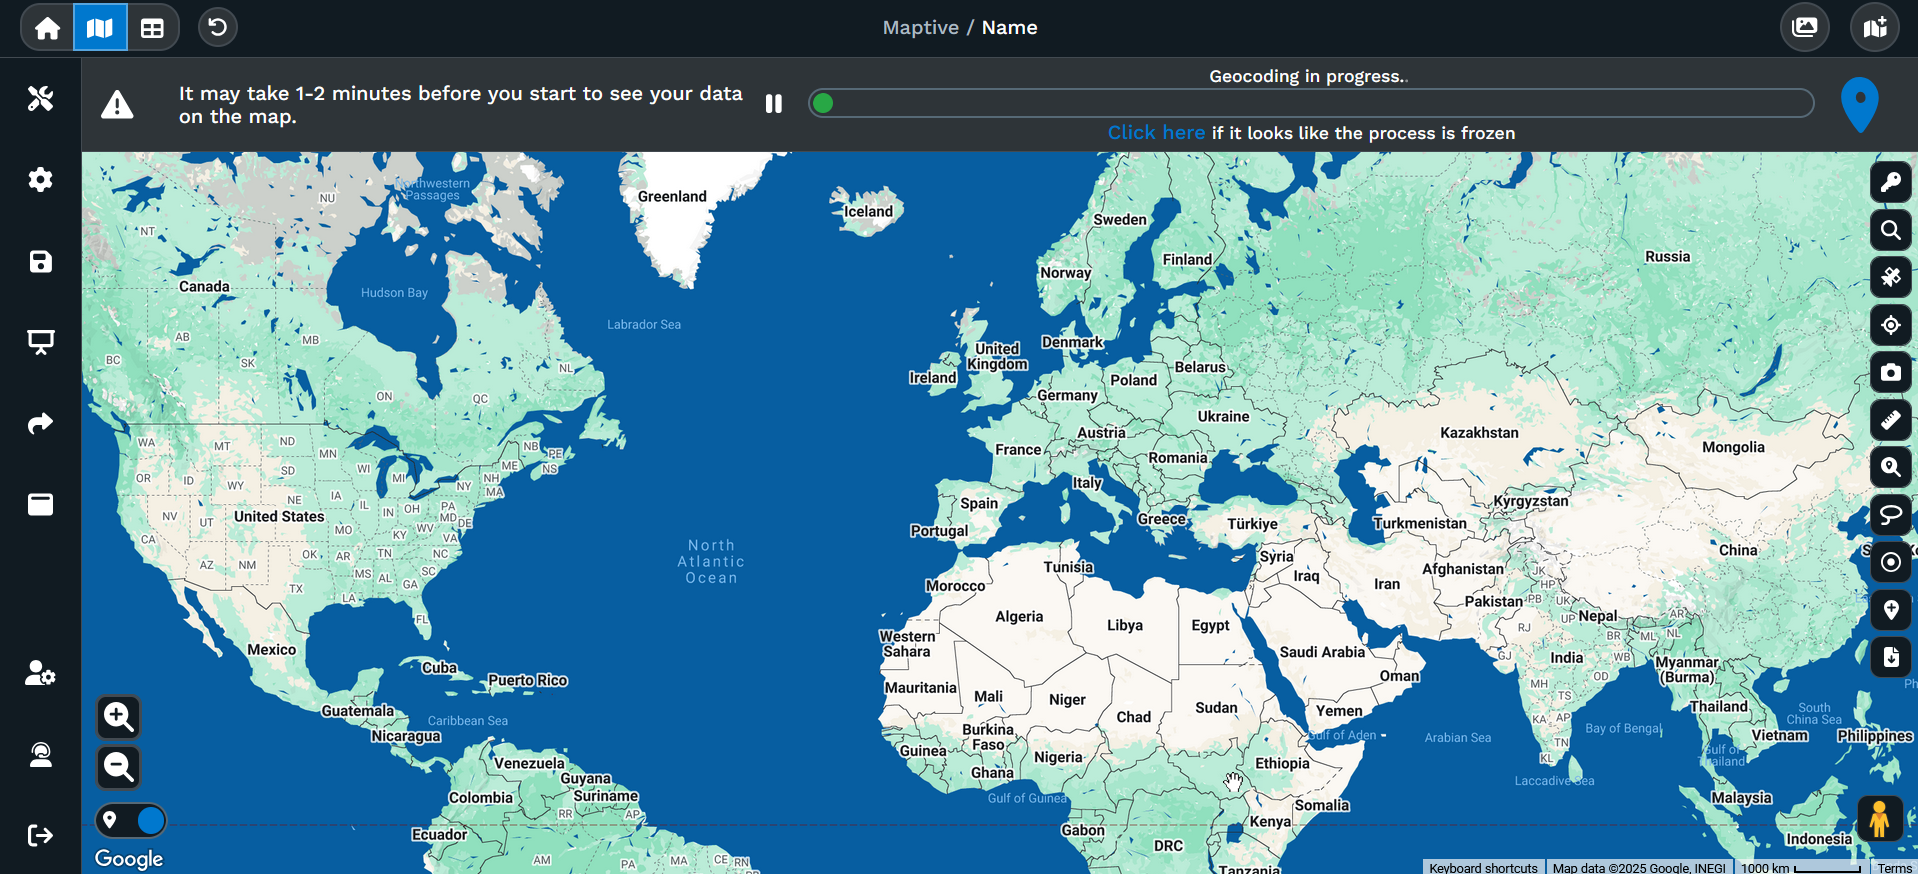
After hitting Done your map will begin to load. The length of time is dependent on the size of your data.