MaptiveIQ - How to use the Automated Territory Tool
The Automated Territory Tool allows you to create a set of territories based on your data, demographic data, or a combination of the both of them.
Activate the Automated Territory Tool
Step 1: Click the Map Tools icon
Step 2: Click the Territories Entry
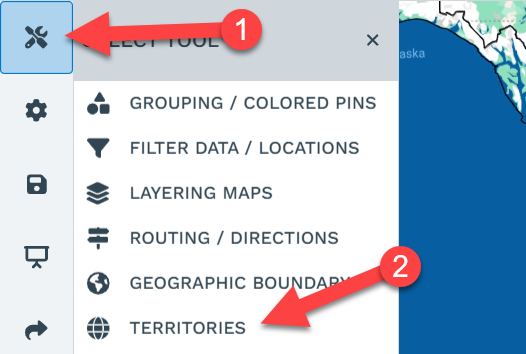
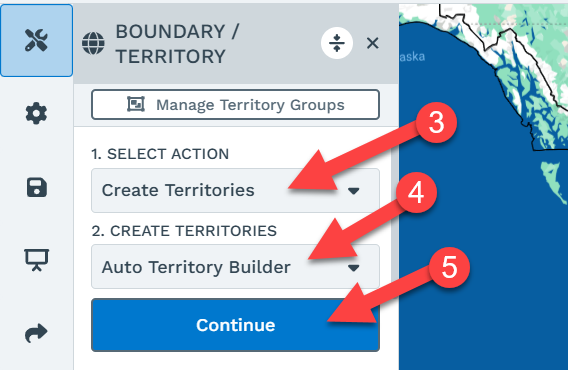
Step 3: Select "Create Territories"
Step 4: Select "Auto Territory Builder"
Step 5: Click "Continue"
Using the Automated Territory Tool
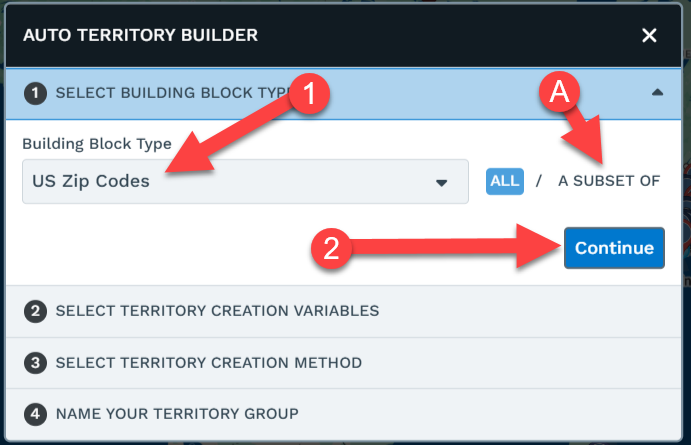
Step 1: Select the boundaries you want the territory to be built from. Here I chose "US Zip Codes" A : If you don't want to have territories that span an entire country you can select just the area of the country you want here. Instructions for that are here <LINK>
Step 2: Click "Continue"
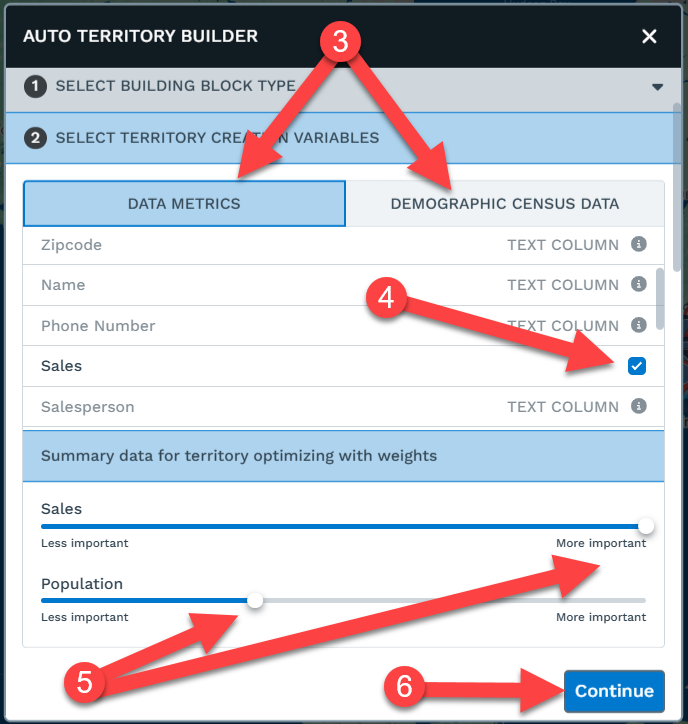
Step 3: You can choose "Data Metrics" which is data in your spreadsheet, or Demographic Census Data if you are using a boundary that we have that data for
Step 4: There will be a checkbox next to columns that can be used in the balancing process. You will need to choose at least one variable from either your data or from Demographics
Step 5: If you choose multiple values, you can choose how much importance each one has. In this case the total sales of an area is the most important and the general population is a secondary factor. If put them both at the same importance the system will weight them equally
Step 6: Click "Continue"
Step 7: There are a number of options here but most commonly you will just select the number of territories you want to create.
Step 8: Click "Continue".
Additional features
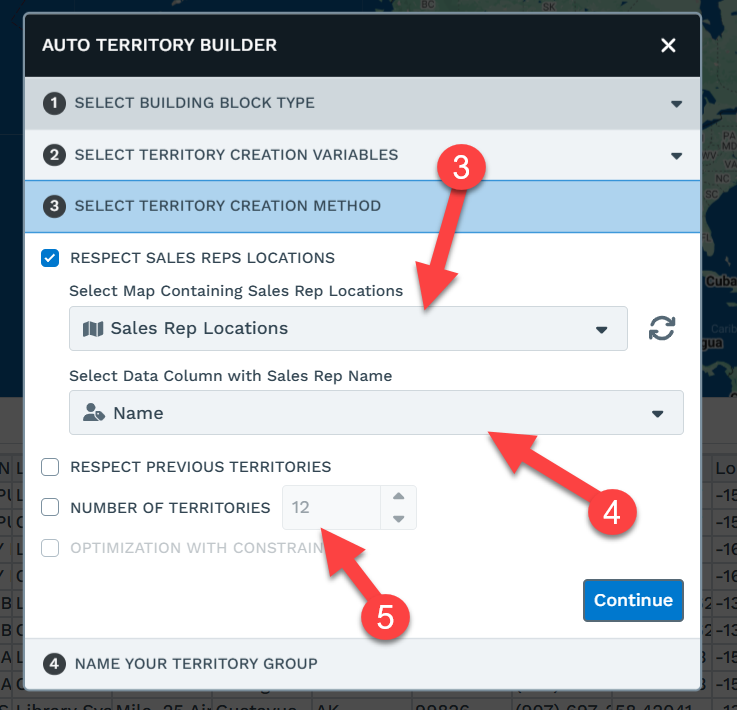
A) Respect Sales Rep Locations: If you have a map with your sales rep locations you can choose the map here and their locations will affect the shape of the boundaries.
B) Respect Previous Territories: If you have existing territories you can select them as a starting point so they can be rebalanced
C) Optimization with Constraints: This allows you to set threshold you want a territory yo have for instance Sales should be over $1,000,000

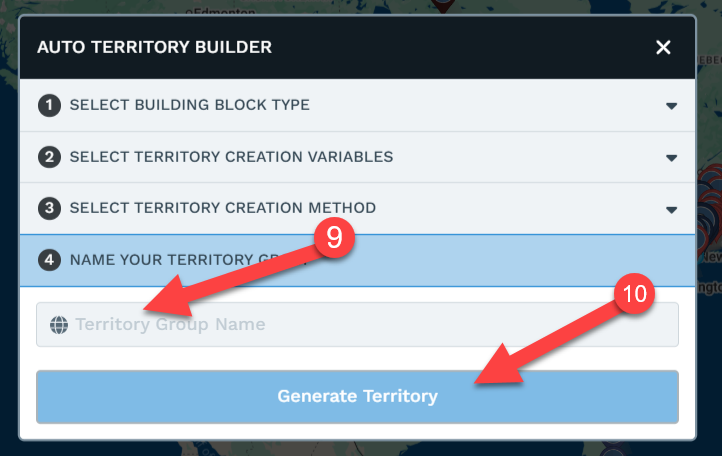
Step 9: Enter a name for your territory group
Step 10: Click "Generate Territory".
You will see a status bar at the top of the screen. Depending on how much data you have and how large of an area you are using to generate territories this process can take between 1-15 minutes

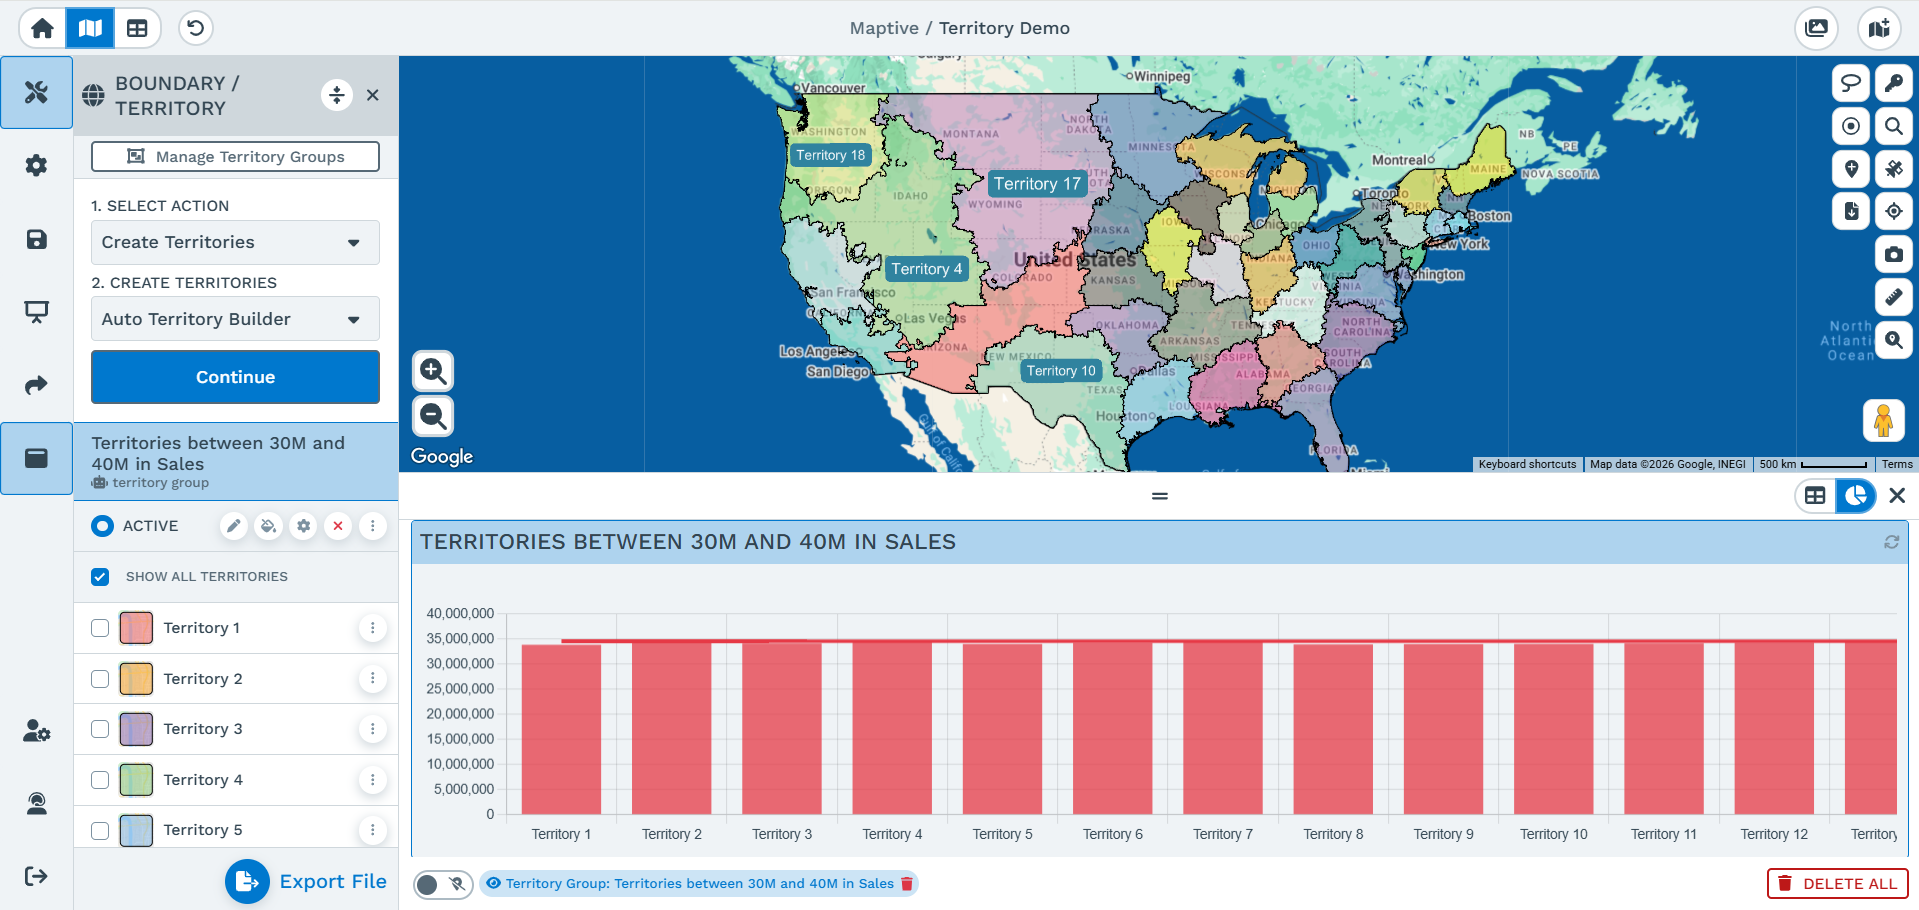
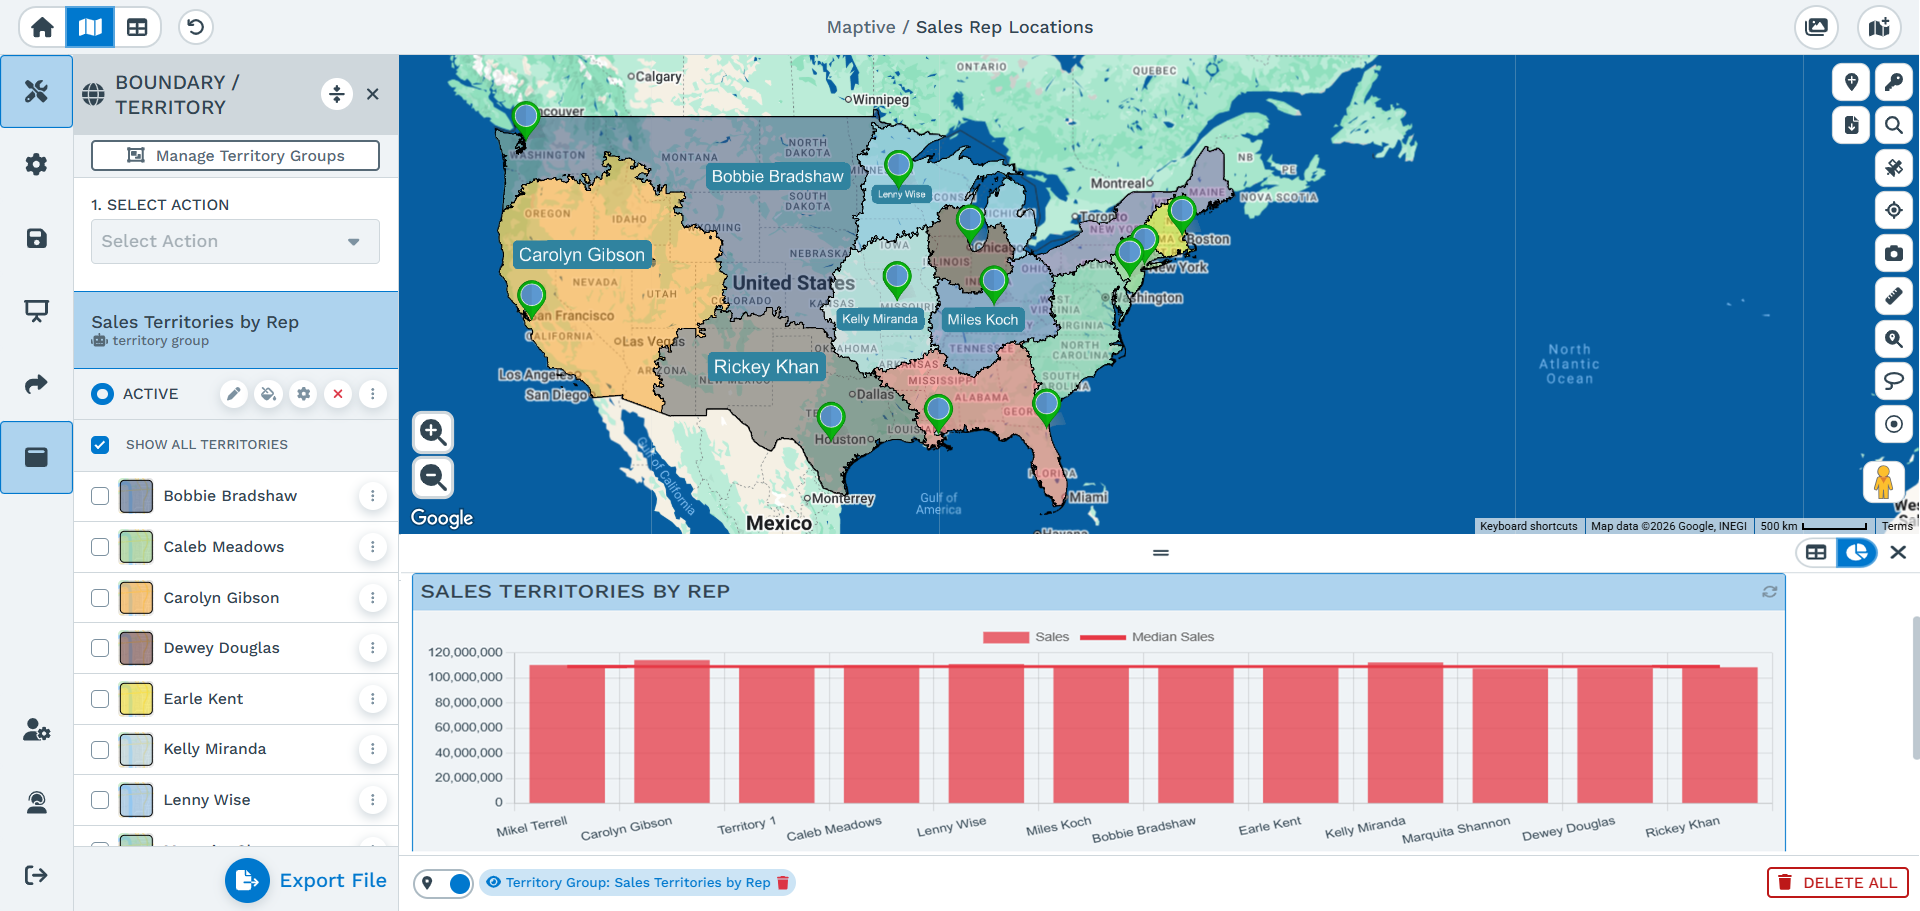
Results
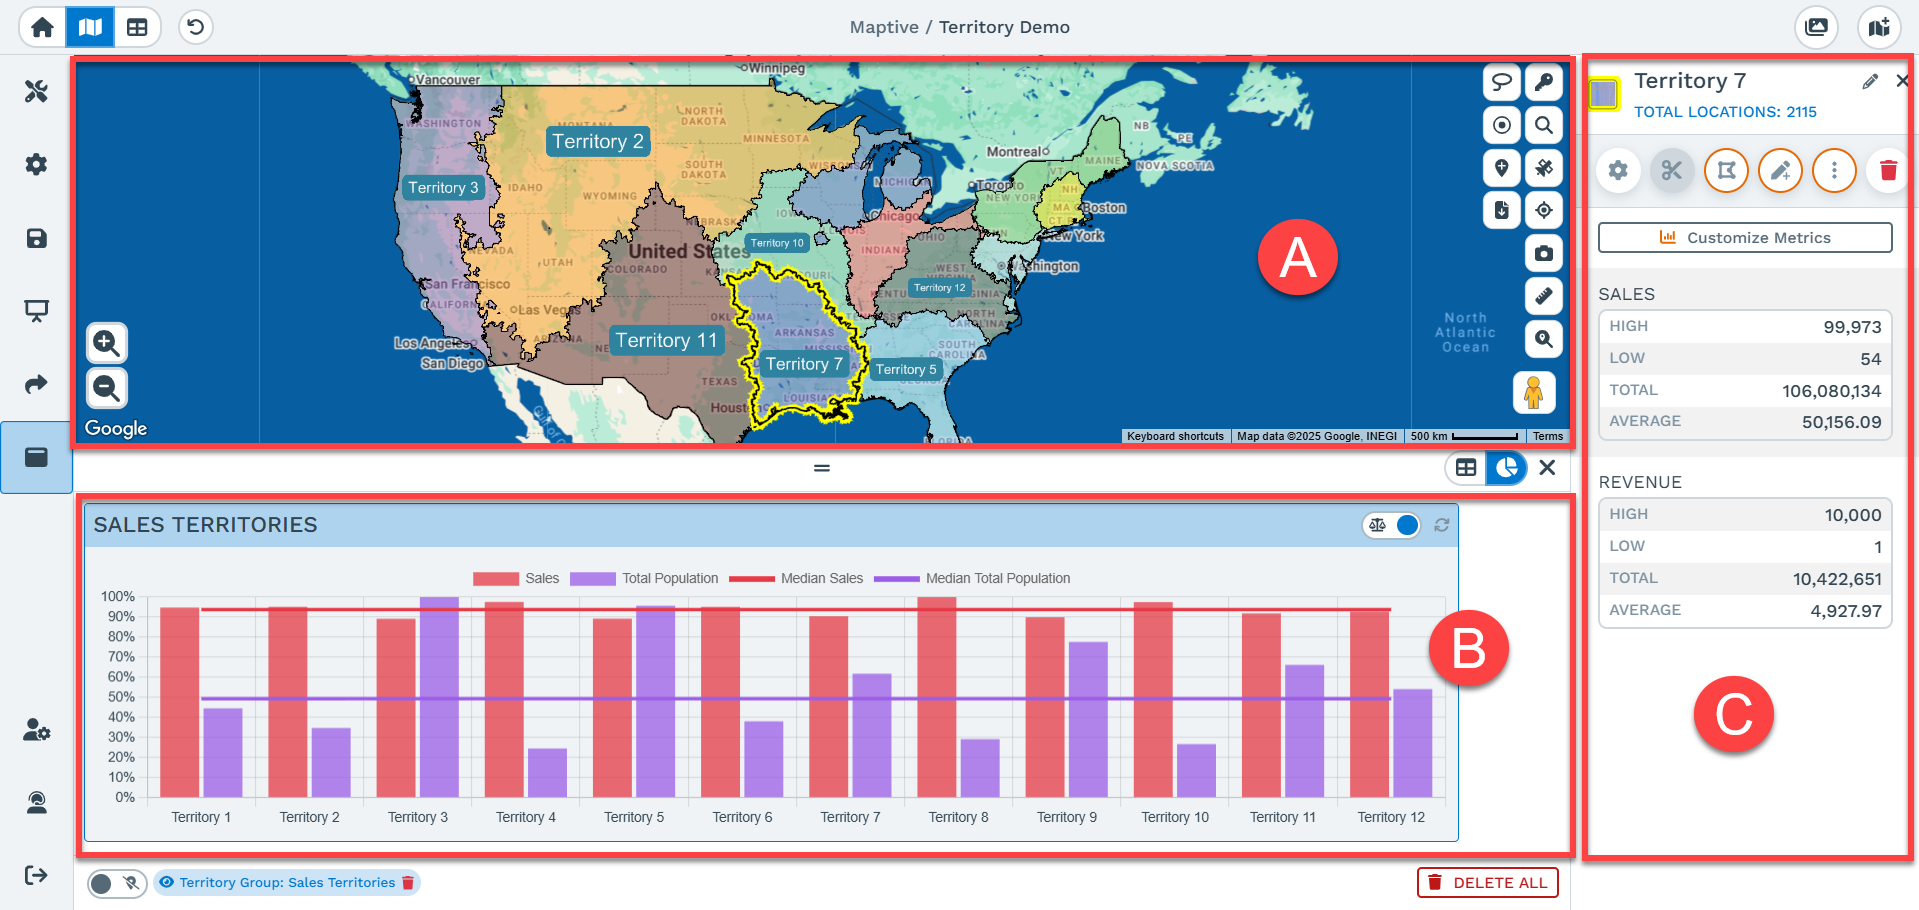
A) The Territory boundaries will be added to the map
B) A Graph is displayed below the map showing the distribution of the metrics in across Sales and Population. In this example Sales was prioritized heavily over Population, so the sales are all within about 10% of each other and the population was only used as a secondary factor.
C) Clicking on a boundary will show you metrics for that area. We add some by default, however you can add additional data from your data or demographics
How to use Respect Sales Rep Locations:
This feature will attempt to place the sales rep as close to the center of a territory as possible. Given the metrics that you choose to balance and the sales rep locations this may not be fully possible, However it will do its best to optimize for both the location and metrics
Step 1: Create a Map with just the locations of your sales reps.
Step 2: Change to the map that contains your sales/territory data, and go through the previous steps until you get to section 3 of the popup "Select Territory Creation Method".
Step 3: Select the map that has your sales rep locations
Step 4: Select the column from the sales rep location map that will be used as the territory name. In this case I am using the sales reps' "Name".
Step 5: The number of territories will automatically change to match how many sales reps you have
Results
Here are the territories added back onto the sales rep map so you can see how they changed compared to the results when run without the sales rep location.
How to add constraints to your territory:
This feature allows you add a threshold to a territory, so that a variable like total sales or number of customers does not go out of an acceptable range for your business. In this example I will be limiting the sales to between 30 million and 40 million.
Step 1: Follow the steps in the "Using the Optimized Territory Tool" above until you reach the "Select Territory Creation Method"
Step 2: Select the check box next to "Optimize with Constraints"
Step 3: Select the check box next to the column you want to add a constraint on. Note: you can only add constraints on columns you are using as creation variables, if you don't see your column go back to the "Select Territory Creation Variables" Step in the popup and add the columns there as well if it is not listed in this step
Step 4: Click into the input boxes to set a specific value, or drag the slider
Step 5: Complete the rest of the steps from the previous tutorial.
Results
Give the total sales in the US and the constraint on the range of between 30M and 40M sales the automated territory tool created 38 territories with the average sales in a territory being about 35M.